
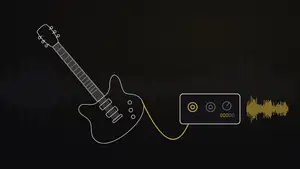
How to Record DI Guitars Properly at Home
A DI track is the raw signal of your guitar, recorded before any amp or effect. It lets you – or your mix engineer – choose and change the amp sound later, through an amp simulator or by reamping into a real amp. But there's one thing a DI can't change: the performance and the guitar itself. Here's how to record DI guitars at home that will still sound great when the gain goes up.
1. Get the guitar ready before you press record
A high-gain amp or plugin magnifies everything in the DI – including tuning problems, dead strings and fret buzz. Sort these out first:
- Fresh strings, put on a day before the session and stretched in, so they hold their tuning.
- Check intonation and setup. Chords that are in tune at the nut but sour higher up the neck will sound worse on a doubled rhythm part.
- Tune before every take – not just before every song. Use a good tuner and tune up to the note.
- Volume knob fully up on the guitar, and choose the pickup you actually want for the part.
2. Use a real instrument input
Passive guitar pickups need to see a high input impedance, typically around 1 MΩ. Plug into your interface's instrument / Hi-Z input or a proper DI box – not a line input, which loads the pickups and makes the guitar sound dull and lifeless. Keep the chain short: guitar, one good cable, interface. Leave pedals out of the DI path unless they're part of the sound you want to commit to.

3. Set levels with plenty of headroom
Record at 24-bit (or 32-bit float) and your project's sample rate – 44.1 or 48 kHz is fine. At 24-bit there's no benefit in recording hot. Aim for peaks around −12 to −6 dBFS on your hardest-hit chords and never let the meter clip: a clipped DI is a ruined DI, whatever happens to it later. Set the gain while playing the loudest part of the song, not the intro.

4. Kill the noise at the source
Hum and buzz that are barely audible on the clean DI become loud once a distorted amp is added. Before you record:
- With single-coil pickups, turn and move until the hum is lowest – usually facing away from your computer screen and monitors.
- Switch off light dimmers, LED strips and phone chargers near your desk.
- Keep your phone away from the guitar and the interface.
- Check the noise with your amp sim switched on, at the gain you'll use.
5. Monitor through an amp sim – but record the clean DI
You play differently through a distorted sound than through a clean one, so monitor through an amp simulator with a low buffer size (or your interface's direct monitoring). Record the clean DI on the track, with the plugin only for monitoring. If you like your amp sound, print it on a second track too – it shows the mix engineer what you were going for.

6. Play it the way it should sound in the end
Editing and mixing can tidy things up, but they can't create a tight performance. This is where great guitar tracks are really made:
- Mute the strings you're not playing with both hands. High gain turns ringing open strings into mud.
- Keep your picking consistent. Palm mutes, accents and dynamics should be on purpose, not accidental.
- Double rhythm parts with separate takes. Copying one take to the left and right doesn't create width – two real performances do. The tighter they are, the bigger they sound.
- Record in sections if you need to, and listen back to every part with the amp sim on before moving on.
7. Organise and deliver
Name your tracks clearly ("Gtr Rhythm L", "Gtr Lead Solo"), write down which guitar and pickup you used, and keep your best takes. When you send the session for mixing, include the DI tracks and, if you have them, the amp-sim versions. My guide to exporting tracks from your DAW walks you through it step by step.
Quick checklist
- New, stretched strings – intonation checked
- Instrument / Hi-Z input or DI box
- 24-bit, peaks around −12 to −6 dBFS, no clipping
- Noise checked with the amp sim on
- Monitor through the sim, record the clean DI
- Tuned before every take, unused strings muted
Recording bass too? Read how to achieve a great bass DI sound. And when your DIs are ready, I can turn them into a finished mix.
Further reading
- Mike Senior, Recording Secrets for the Small Studio (Focal Press)
- Bobby Owsinski, The Recording Engineer's Handbook
- David Franz, Recording and Producing in the Home Studio (Berklee Press)
- Bob Katz, Mastering Audio: The Art and the Science (Focal Press)