
How to Export Your Tracks from Reaper, Logic, Cubase, Pro Tools or Ableton
Sending your song to a mix engineer? The most important step happens before any mixing: exporting every track as its own audio file, correctly. Done right, the mix starts straight away. Done wrong, it costs time, money and sometimes a whole re-export. Here are the rules, and how to do it in the five most common DAWs.
The rules, whatever DAW you use
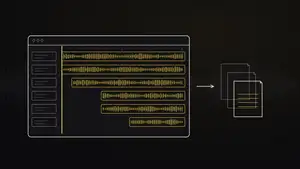
- One audio file per track, and every file starts at the same point – the very beginning of the song (bar 1 or 00:00), even if the instrument only comes in at the chorus. Then all files line up perfectly when they're imported.
- WAV or AIFF, 24-bit (or 32-bit float), at the same sample rate as your session. No MP3s.
- No normalising, and nothing on the master bus – take off any limiter or "mastering" plugin before exporting.
- Effects: when in doubt, export dry. If an effect is part of the sound – a special delay, a re-amped guitar, a filtered synth – export that track twice: dry and with the effect.
- Turn virtual instruments into audio. Export MIDI tracks as audio too, and send the MIDI files as a bonus.
- Clear names: "Kick In", "Snare Top", "Bass DI", "Gtr Rhythm L", "Lead Vox" – not "Audio 14".
- Send the extras: the song's tempo (and any tempo changes), your rough mix as a reference, and a few notes on what you want.

Finally, check your export: create an empty project, import all the files at the very start and press play. If it sounds like your song, you're ready to send.

Reaper
- Select all the tracks you want to export.
- Open File > Render (Ctrl+Alt+R on Windows, Cmd+Option+R on Mac).
- Set Source to Stems (selected tracks) and Bounds to Entire project.
- Choose WAV, 24-bit PCM and the project's sample rate. Give the files a name pattern that includes the track name.
- Click Render.
Stems rendered this way include each track's effects. For dry files, bypass the effects first – or use File > Consolidate/Export tracks, which exports the audio without track effects or volume.
Logic Pro
- Choose File > Export > All Tracks as Audio Files.
- Set Save Format to WAV or AIFF and Bit Depth to 24-bit.
- Tick Bypass Effect Plug-ins for dry tracks, and Include Audio Tail so reverb and instrument tails aren't cut off.
- Leave Include Volume/Pan Automation off, unless your mix engineer asks for it – Apple's own guide notes that exporting without automation is generally preferable for processing elsewhere.
- Set Normalize to Off, pick a folder and click Save.
Cubase
- Set the left and right locators around the whole song, from the very start to just after the last note.
- Open File > Export > Audio Mixdown.
- In the channel selection, choose the channels to export. Cubase Pro and Artist can export several channels in one go; in some editions you may need to export them one at a time.
- Choose Wave, 24-bit and the project's sample rate.
- Name the files and click Export Audio.
Pro Tools
- In recent versions, select the tracks, right-click a track name and choose Bounce (Track Bounce).
- Choose WAV, 24-bit, the session's sample rate, and Offline for a faster-than-real-time bounce.
- Make sure the selection runs from the very start of the session to the end of the song, so every file has the same start and length.
On older versions without Track Bounce, select every track from the session start to the end, use Edit > Consolidate Clip, and then export the consolidated clips as files from the Clip List.
Ableton Live
- In Arrangement View, select the whole song from bar 1 to the end.
- Open File > Export Audio/Video.
- Set Rendered Track to All Individual Tracks. Check that Render Start is at the very beginning and Render Length covers the whole song.
- Turn Include Return and Master Effects off for mixing.
- Choose WAV or AIFF, 24-bit (or 32-bit), the project's sample rate, and turn Normalize off.
- Click Export.
Before you hit send
- All files start at the same point and play back in sync in an empty project
- 24-bit (or 32-bit float) WAV/AIFF at the session's sample rate
- No clipping, no normalising, nothing on the master bus
- Clear file names, tempo, rough mix and notes included
- Everything zipped into one folder, uploaded with a file-transfer service

Recorded guitars or bass at home? Have a look at how to record DI guitars properly and how to get a great bass DI sound. Ready to have your song mixed? Here's how I work, and the prices.
Further reading
- The official manuals: REAPER User Guide (Cockos), Logic Pro User Guide (Apple), Cubase Operation Manual (Steinberg), Pro Tools Reference Guide (Avid), Live Reference Manual (Ableton)
- Mike Senior, Mixing Secrets for the Small Studio (Focal Press / Routledge)
- Bobby Owsinski, The Mixing Engineer's Handbook
- Bob Katz, Mastering Audio: The Art and the Science (Focal Press)